Showing posts with label Christmas. Show all posts

Thursday, December 22, 2011

Last Minute Christmas Crafts (with things you probably have in your kitchen!)

There's something about doing simple crafts with your kids that helps slow down the chaos of the holidays!  We recently enjoyed making these two crafts.

A paper plate wreath:
Just cut the center from a paper plate, paint green, and decorate as desired when dry.

 Egg carton Christmas tree:
Cut a strip of three egg sections together, a strip of 2, and one alone.  Paint, let dry, then glue onto cardboard.  Decorate with markers or stickers.

Merry Christmas!

Friday, December 16, 2011

Christmas Imagination and Movement Cards

Elise from Inspiration Surrounds Creativity Abounds created some fun imagination and movement cards based on Christmas themes.  Here are a few examples of the cards:

Imagine you are an elf carrying heavy presents.

Imagine you are Santa going down a chimney.

Can you curve your body like a Christmas stocking.

Imagine you are Santa sneaking presents under a Christmas tree.

Can you curve your body like a candy cane.
 
What a great way to get out some wiggles and imagine!  You can download the cards free here.

Thursday, December 8, 2011

Build A Felt Snowman

After seeing this idea on I Can Teach My Child, I wanted to make a kit for Isaac.  I didn't use the template Jeane provides, but instead just cut out shapes of hats, eyes, a carrot noes, and other snowman parts.   After making his first snowman, Isaac asked for some specific part...have you ever seen a snowman with a Star Wars light saber?

Tuesday, December 6, 2011

Christmas Tree Shapes and Colors

This easy-to-make activity was designed to help Amy (25 months) practice colors and shapes.  She knows pink and purple without fail, but often mixes up other colors. :)

I cut out a tree from green felt and then circles, triangles, and squares from the colors of the rainbow plus black and white.  (You could also use paper and glue this little tree together if you'd like.)
 As she chose the pieces (ornaments) to put on her tree I would ask her what shape and color she was using, and correct as needed.  Sometimes I would ask her to find a certain color or shape to see if she was able to remember what she was learning. 

The great thing is we can play this game again and again. And the little felt shapes were a great fine motor activity for her as well.  She was very proud of the tree she decorated!
Can you tell from her outfit that she adores purple and pink!?

Older kid adaptation:
-Isaac (almost 4) enjoyed making a face with the ornaments on his Christmas tree.  He also made up a story about how his tree scares away animals...a fun creative thinking activity!

Thursday, December 23, 2010

Happy Holidays

I'll be spending the next few weeks with family and posting will be very limited. I wish you and yours a wonderful, safe, and joyous holiday season!
One last smile: I loved finding this lizard and snake tucked into the Christmas tree with the other ornaments. Christmas is even more magical with children in the house!

Wednesday, December 15, 2010

Make Believe Mailbox

Several months ago I made this "mail box" out of a box covered with brown paper. It was well played with and then put away. But with Christmas cards coming in we pulled it out again for a second life!

You can make a mail box out of any narrow box, a shoe box works well. I taped the flag to the side, although you could use a brad so that the flag can rotate (up when a letter is ready to be sent and down when it's empty).


These are the "letters" we originally made, although every postcard, note, and card from friends and family that is addressed to my son soon becomes part of his home mail system. I cut out pictures from old magazines and wrote notes like "I can't wait to talk to you on the phone" and "Let's get together to play." Isaac then places the letters into the envelopes we addressed together. There is an envelope for most of our extended family.
With Christmas cards this has been so fun to see pictures of all those loved ones who live far away. And Isaac loves pointing to each person in the pictures and naming them one by one.

We may even have to send a letter to Santa in the mail box!

This activity goes great with two loved books, The Jolly Postman (which Isaac also loves for the envelopes) and The Jolly Christmas Postman:


Saturday, December 11, 2010

What My Children are Getting for Christmas

A friend inquired about what we are giving our children for Christmas, so I thought I'd make a list and share it here. I would love to hear what you are excited to give your children!

First off, my husband and I strive to give presents that are homemade or thoughtful, but that don't cost a lot of money. Here's what we've come up with for this year:

-Books: both kids are getting a few books purchased at a local thrift store for 25 cents each. I have been able to find some great books in almost new condition, including this must have for little ones with a dad in graduate school at the U of M:


-Homemade Games: Isaac (who's almost 3) is getting a letter matching game made out of baby food jar lids. Inside each lid I glued a circle with either a lowercase or a capital letter. The object of the game being to match the capital letters with the lower case letters. I'm guessing that this will be a bit tricky at first and we'll just start with a few at a time.
Amy (who just turned 1) will be getting a lid drop jar. I took an oatmeal canister, covered it with fun paper, and cut a hole in the lid. She'll get a pile of baby food jar lids to drop into the container through the hole. Knowing how much she likes putting things in and taking them out of containers, I think this will be a hit!

-A Castle from Box Creations. I won this on a giveaway a month or so ago and have been waiting until Christmas to bring it out. But Christmas came early at our house; we set it up yesterday and have been playing in it and decoration it ever since.

-Felt Hair Clips: Although Amy may not appreciate these yet, her hair is getting long enough to place a small clip in. I enjoy making them, and they are relatively easy. There are lots of free tutorials on the web, or you can buy them in varying price ranges on etsy. Check out the ones in my shop here.

What are you giving for Christmas this year? What has been the best gift you've given your children for a holiday?

Monday, November 29, 2010

Good Deeds Manger for Baby Jesus

A family tradition from my childhood took place during the month before Christmas as we tried to fill a manger with "good deed" straw so that it would be soft for Baby Jesus. Each piece of yarn for the manger was earned by doing some act of service for another person.

This year I wanted to involve my two year old in this tradition, so we made a manger for Baby Jesus out of a toilet paper roll tube. We only started this last night, but already he is eager to help and serve. First thing this morning he was sharing Gerber Puffs with his little sister, something that doesn't always happen at our house!

To make a Good Deeds Manger, here's what you'll need:
-toilet paper roll tube
-scissors
-yarn, string, or real straw
-glue or tape (I used a hot glue gun)
1. Cut the toilet paper tube in half:

2. Cut off about 1 inch of one half of the tube:

3. Use the middle sized piece, cut it to look like an I. This will be the base of the manger:
4. Tape or glue the two pieces together:
5. Cut your yarn/string/straw to fit roughly in the manger. I looped it around my hand so that I could cut lots at the same time. You'll want a good pile, each piece will represent a good deed, and you want Baby Jesus to have a very soft bed!
6. Explain to your little one that with every good deed done, he or she will get to place a straw into the manger. Our service to others is our gift to the Savior. On Christmas eve, place Baby Jesus in the manger. (I may make a Baby Jesus, and if I do I'll post about it, or I may just use the Jesus from our ceramic nativity.)

Friday, November 12, 2010

Advent Calendars

It's getting to be that time of year when advent calendars are working their way out of storage. I've been thinking of and searching for simple advent calendar ideas I can do with my children.

For Thanksgiving we've been writing one thing we are grateful for each day on a construction paper leaf and hanging the leafs as a garland on out wall. This has been good for all of us to think and focus on the blessings we've been given. I'd like to continue it in December, but maybe write on "snowballs" torn from white paper, or stars of yellow paper, or even on links in a paper chain.


Here are a few more quick, kid friendly advent calendar ideas:

-Santa's beard (print out Santa and glue on cotton ball to his beard each day until Christmas.)

-24 special activities (come up with a list of 24 activities and do one every day/evening in December until Christmas. Here are some ideas for family activities. You could draw the ideas out of a hat or stocking, put them in numbered envelopes or matchboxes, hide one each day for the kids to find, or just read them off a list!)


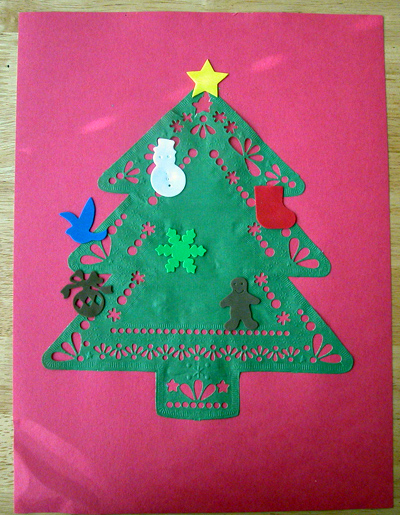
-Tree Doily advent calendar (using supplies from the dollar store make a one year use advent calendar, you could even make one for every member of the family!)

And if all else fails, there are always to advent calendars with a little chocolates behind each day's cardboard flap! :) I think I saw them at the dollar store last time we were there!

Friday, December 5, 2008

Salt Dough Ornaments

Yesterday I made Christmas tree ornaments out of salt dough with my son and the little girl I baby sit. It will be their first Christmas, and every child needs a "First Christmas" ornament, so why not one that is personalized?

I used this recipe I found online for salt dough, which worked great. (In the future, if I was only making one or two ornaments, I would just make half a batch.)

½ cup salt
1 cup flour
½ cup water

Directions:
-Preheat the oven to 250 degrees F.
-Mix together, salt, flour, and water until dough is formed.
-Knead the dough on a floured surface until the mixture is elastic and smooth. If dough is too sticky, sprinkle with flour, continue to do so until stickiness is gone. Do not add too much flour, this will dry out the dough and will cause it to crack before you get a chance to bake it.
-Roll out the dough to about ¼” thick with a rolling pin that has been dusted with flour.
-Use cookie cutters or mold the dough into a circle and push child's hand onto circle.
-Use a toothpick to make a hole toward the top of the shape. Poke the toothpick into the shape, then holding toothpick straight up and down, make a circular motion as if you were stirring something. Keep circling until the hole is the size you want.
-Place all shapes onto an ungreased cookie sheet and place into the preheated oven.
-Bake for 2 hours. Note: Because I didn't roll my dough thin enough, I needed to cook mine longer!
-Remove from oven and allow to cool completely.

I decided to paint the ornaments, at least the hand prints, so that they would stand out more. I used some acrylic paint I had left over from a project last Christmas (PS: if you live in Provo and want to paint your ornaments with red, green, or white, you can come use my paint!)
Here's how they turned out without and with paint: (The paint is shiny because it's still wet in the picture)


This was a quick project, completed in an afternoon. And I think they turned out well. Merry Christmas!

Wednesday, December 3, 2008

Advent Calendars

So I know I'm a little late with this post seeing as we are already a few days into December, but my sister-in-law just posted about an advent calendar that she made over Thanksgiving that I love and wanted to share also.

She used a mini muffin tin, and painted it red. The papers for each day are held on with magnets. You can put what ever you want inside, such as treats or ideas of an activity to do that day. Here's the list my sister-in-law included:
Use puppets to tell bedtime story
Star gazing
Give everyone crazy hairstyles
Go out for ice cream
Have an indoor picnic
Pick a toy to donate
Pick cans of food to donate
Watch a Christmas movie with popcorn
Dance like crazy to music
Have a webcam with cousins or grandparents
Have a bubble bath
Fancy dress for dinner
Drive around to see Christmas lights
Sing Christmas songs around the piano
Make cookies or a treat together
Eat breakfast for dinner
Pack our bags for our trip
Do a Christmas craft
Look at family scrapbook of other Christmas’
Drink hot chocolate with marshmallows
Make little snowmen with big marshmallows, pretzels and candies
Wrap a Christmas gift
Read a Christmas story
Use nativity figurines to play out Jesus’ birth
Cut paper snowflakes out
Go caroling to a few neighbors

So fun! Thanks for the idea, Tati! What other advent calendar ideas do you have?
(One of my favorite ones as a kid were the chocolates hiding behind each door:)
One that my husband and I do is make a small flip book of paper, one page for each day 1-24. Then we switch back and forth writing notes to each other. It's always a treat to find the little booklet waiting for you on your pillow at night!
An advent calendar that we have done in the past, but not this year, is a sticker calendar. We cut out "windows" that fold back in a piece of construction paper and label each window with a number 1-24. Then we paste another piece of construction paper behind the first. Under each window flap we tape a sticker (still with it's backing on). Then each day we open a flap and have a stick to wear. (We've done this also with scriptures about Christ under each flap.)

Saturday, November 22, 2008

Oranges with Cloves

Smells bring back memories for me, and the smell of cloves and oranges reminds me of Christmas growing up. I love to make these decorations, and this last week made them with some of my husband's cousins. This project is probably more suited for slightly older kids (I was making them with a 6 and 9 year old) Basically you take whole cloves and push them into an orange. You can then hang the smelly decoration in your home.

Some tips that we found to be very helpful:

-Draw the design you want in pencil before starting.

-use a dull pencil, a knitting needle, or shish-ka-bob stick to poke holes in the design you want. That makes it much easier to poke the cloves in.

-if the tops of the cloves are hurting your thumb, try wrapping a band aid on your thumb for some added padding.

-if you want to hang with ribbon, placing cloves on either side of the ribbon will help it from sliding off.

They smell so good!